Travel Rod for the Car and Canoe

One of the biggest hurdles in traveling with a car on the road or via canoe in the Boundary Waters (or anywhere for that matter)  is bringing along a rod and reel.  Conventional open water rod/reel combos are long, get caught in the brush, jammed in the back of the car, and can be challenging to transport without snapping the tip off turning a medium light 6 foot rod into a medium 5’6″ rod.  I’ve successfully carried a lot of rods through the brush on portages for a lifetime without ever having one break.  I didn’t say that I never came close to wiping my rod out on a branch but I’ve never broken one personally. That being said, I’ve had other people break my rods because they were clueless.  It’s no surprise that I only let my dad carry my rod on a portage or I carry it myself.  Those are the only two people allowed to handle my fishing rod when out in the brush.

Based on the fishing rod sales at Red Rock, a lot of people snap their rods off while carrying them in the woods around here.  They do a whole bunch of other dumb stuff, but two ways to handle fishing rods will keep your rods going for a long time if you like remote places:

  1. More rod tips die unnecessarily by not understanding that “one ALWAYS carries a fishing rod on any trail in the brush, ‘rod-butt-first’”. I would venture that 95% of  fisher-kind gets this ass-backwards every, single time.  Carrying your rod tip forward in brush can, at times, end poorly.
  2. When passing through a screen door, DO NOT walk out “rod butt first”.  If I had a nickle for every customer who walks out through the screen door at Red Rock with a BRAND, SPANKIN’-NEW, ROD, and pokes the rod butt to the outside world completely forgetting about the remaining 5 feet of rod behind them.  Guess what?  The screen door gets it every time.  WHAP!  SNAP!  For this reason specifically, I built the screen door at Red Rock with no spring on it.  A magnet holds it shut.  You have to physically shut it.  If you physically shut it on your brand new rod, there’s no hope for you.

Sure, you can tie your rod into your canoe, but depending on a number of variables, this is sometimes a time-eater and causer of neck pain.  It is also no guarantee that the rod will survive your Labrador or your 13 year old, and you still have to wander around in the brush.  You’re in the woods for Pete’s sake.

Introducing the Red Rock Brush Rod

Order this GREAT Spinning Combo Here!

At least, that’s what I’m calling it.  I was at a buying show wondering why, in a sea of ice fishing rods, would Daiwa have this neat little ice fishing rod and not be teaming it up with a reel for a cool winter combo.  I asked the snot-nosed sales rep that and the young lad looked at me like my “completely unheard of, totally unique, idea” for an “ice rod combo” was going down as a great revelation in fishing history.  Never mind that when I arrived at the Daiwa space, he and the other children (first time at the show), were throwing casting weights to irritate the women across the aisle and cranking them back in with their Daiwa reels, ironically while looking at competitor booths selling every conceivable ice rod combo all around Daiwa.

Young lad aside, he couldn’t answer questions about this little rod other than it was a “dock rod” .  Turns out, this is a pretty cool little rod for fishing out of a canoe as well.  They say it can cast up to 20 yards which is 60 feet.  For sneaking around with a canoe or even a boat, that is WAY enough for darn near any kind of Boundary Waters fishing.  You can plug the shore for bass, drop over the side and jig for walleyes and lake trout, and throw some fairly heavy tackle for big northern pike.

I’ve often wondered why my ice fishing stuff which is comprised of everything being tiny (compared to my summer stuff) can work absolutely great in the middle of winter dragging a fish up through 2 foot deep hole in the ice.  Why is that?  My tiny little 27″ medium rod can pull 1 ounce airplane plugs 55 feet down and then pull up a 7 lb laker with a reel smaller than I would ever think to use in the summer.  Ice fishing is THE most brutal use of fishing gear.  If it’s not frozen, it’s freezing.  Everything is colder.  Water lands everywhere and freezes instantly.  And, then after all those knots of ice get cranked up through the eyelet of that tiny rod and into that tiny reel,  they all stick together and you are there trying to crack it off to unstick it just so you can do it again.  Everything is more brittle and it gets used pretty hard whether you are catching fish or not.  My ice gear gets used every bit as hard as my summer gear and maybe even moreso.

So, if we have a short rod, reel combo for summer fishing to do exactly the same thing as ice, who is to declare us wrong?

Tri Force Shorty

Tri Force Shorty

Ponder This

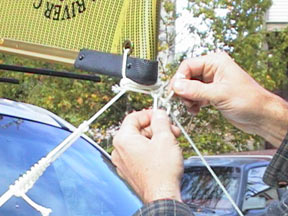
  • Just think how easy it would be to tie a 36 inch fishing rod into a canoe under the seat with a couple of  lighter weight bungees?
  • How much easier would it be to walk on a portage with a 3 foot rod?
  • Just think of how easy it would be to land your own fish with a landing net using a 36″ long rod instead of a 72″ rod.
  • What do you think the odds are that your partner in the front of the canoe is going to knock your hat off with a sloppy back-flip of a rod while winding up for a cast with a 3 foot rod?
  • What would it be like to jig heavy trout lures  over the side when jigging in Kekekabic Lake for lakers in May/June?

The Daiwa Triforce Shorty is available in both spinning and casting versions.  For those unfamiliar, casting versions have a “trigger” on the handle and would be the style you’d use for a baitcaster reel.  You could also rig it up with a a spincast reel like a Daiwa Silver Cast or Gold Cast.

We’ve teamed it up with the Quantum Triax TRX10 Reel for great balance.  This reel would take 100 yards of 6 lb. mono and probably 80 yards of 8 lb. mono.  You could cheat and go to 15 lb. test braid which would fit 125 yards on this reel as it is 4 lb. test diameter.  The Quantum Triax  reel very nicely matches the Daiwa Triforce Shorty and comes with 7 ball bearings and anti reverse. It’s bail closes with just the right amount of force.  I like an easy-closing, but not too easy, bail.  The reel weigh in at 5.8 ounces.

Quantum Triax TRX10F

Quantum Triax TRX10F

Order this GREAT Spinning Combo Here!

We’ll be offer the Triforce/Triax Brush combo at redrockstore.com once we get a bunch of parts and pieces in our website put together.  

canoe fishing rod combo, brush fishing combo

Perfect rod for canoe camping or crossing through rugged territory

Car-Topping Your Canoe – The Right Way

Come tie one on with Red Rock!

Here’s how we tie a canoe to a roof rack.  This is THE way you’ll want to do it as well.  While creativity in  canoe tying is fun, it’s much less fun if your canoe blows off your roof on the interstate at 75 mph!

Pictured below is a canoe on a Thule Rook Rack System.  If you don’t have a Thule System, don’t worry – this method will work with all roof racks.  This particular rack is equipped with Thule Canoe Carriers which are little plastic blocks that you slide to the gunwale of your canoe, evenly on both sides.  For the round-bar Yakima systems, their canoe blocks will look a bit different but do exactly the same thing.   If you don’t have the canoe carrier blocks, you can tie your canoe on just fine without them.  Just throw it up on the load bars an follow the pictures below.  Without the blocks means that you may get some sideways movement when those big fat trucks go flying by on the freeway.  Not a huge problem, but the canoe carrier things DO make your canoe more secure.

STRAPS – There is only one kind of strap to use, period.  Stay away from buying those hook-type straps, ratchet straps, and any other kind of strap that does not look like the one you see me using in the photos below.  YUP – I’m hearing him right now as I type – the guy in the back who’s declaring how he’s rigged up a thing-a-ma-jig using hooks, and ratchet straps, and eyebolts and it’s worked fine for the last 5 trips to the Boundary Waters.  Fine, if he’s happy with a bunch of hokey 2 X 4’s U-bolted to the factory rack on his roof, please tell him to continue.  For the rest of us, we’ll be using two (2) canoe straps with a buckle on one end, no hooks, no ratchets. Ratchets are always one click too tight OR loose and while it’s unlikely that they’ll damage a Souris River Canoe, they can put a dent into your gunwales especially if you own one of those canoes with the rounded-top, hollow aluminum gunwales.

ONE MORE THING ON CANOE STRAPS – You NEED them!!! At least one over the top of the canoe (when using foam blocks), but I prefer two even with foam block sets whenever possible.  I met a guy this summer at our store who had a Wenonah tied to his mini-van just by two little ropes on the bow and stern, only.  On top of his van he had a hokey 2×4 assembly with what appeared to be some foam and electrician’s tape that made a bump next to the gunwales of his canoe which served as a crude set of canoe carrier blocks.  He had NO straps over the top of the canoe but relied on those pieces of foam and about 500 feet of black tape wound on each 2×4 to keep the canoe centered.  It was beauteous!  Order Canoe Straps Here – Color may vary – doesn’t matter.

Upon noticing that he had no straps over the top of the canoe, I gently pointed out that he might consider strapping the canoe down with the most important part of tying down any canoe – two canoe straps over the top of the canoe.  He quickly got his nose in a snit and proclaimed that after 10 road trips (he’s now an expert in his own mind) to the BWCA, he’s never had any problems and sees no reason to change.  I pointed out that should that itty-bitty 3/16″ nylon rope at the front of his car break, he’d be trolling his canoe behind his car down the freeway after it went airborne.  Worse yet, his canoe might even kill somebody else as it wraps over the windshield of a mom with her 2 kids in the car following behind him.   He didn’t like when I pointed that out and; typical of a MacGuyver-wannabe, left with his nose in a bigger snit.  I think he was feeling that I was trying to get rich by selling him two canoe straps.  Whoa BOY!  We eat tonight, Annette!  I sold two canoe straps!  What will we do with all our new-found wealth that came from my high-pressure canoe strap sales pitch???

Folks, for your own safety and the safety of others, DON’T BE CHEAP when it comes to buying the right straps, whether you buy them from us or somewhere else!  One spring-activated-lever-cam-buckle on the end of the strap is the type of strap you want.  That’s all I have for now.

——————————————————-

This is the canoe strap you need.  Notice how under the buckle there is a black nylon pad that protects your canoe.  In this pic, I’ve run the end through the buckle and am pulling it tight.

Car-topping a canoe

This photo shows the other side of the same strap as in Photo 1. The strap MUST go over the top of the canoe, UNDER the load bar (and under the Canoe Carrier Block), and back up over the canoe.
2

IMPORTANT:
The strap must go over the top of the canoe only and must lay parallel to itself without being crossed on top of the canoe.
If you criss-cross the strap on top of the canoe, you won’t be able to tighten it properly.   At no time EVER does any canoe strap get placed under the canoe while it rests on top of your roof racks.  

————————————-

To tighten the strap, you must first slide the cam-buckle (metal part) up towards the chine of the canoe and depress the lever that says “press”.  The strap, that you pulled through from the underside of the cam buckle, gets pulled through fairly snug with one hand, while you depress the “press” button with your other thumb.
3

Next, grasp the end of the strap with both hands and snug her down a bit more.  Don’t try to climb up the side of your car or go into the Iron Cross.  Just give it a little more tension within reason.
4

I like to run the excess strap straight down from the buckle and then wrap it around the load bar as barely depicted behind the wrist with the watch on it.
5

Wrap the excess strap around the thwart, or seat, or yoke and bring it back to tie with a half-hitch around the main, vertical portion of the straps. This acts as a fail-safe and keeps the canoe from going forward while panic-braking for moose. Do the same with the second strap on the other load bar only tie the excess backwards to prevent the wind from pushing canoe back while attempting to elude the law at high speed.

6

Buy a pair of Top Ties from us and install them.  Your cost is $9.95 per pair.  Installation is  pathetically easy. (Click to see the patheticism of it all, HERE)   If you are at Red Rock, we’ll run out and do it for you.
7

These little nylon loops give a superior canoe holding rope angle, prevent you from crawling around under your car, and won’t damage anything on your car.
8

Order your canoe straps from us HERE.  You will need two.

Order Your Top Ties Here
 (set of two)

Tie one end of a rope to your Top Tie on the driver’s side of the vehicle and thread through the handy-dandy grommets in the end of all Souris River Canoes.  The rest of you guys will have to loop it once over the grab-handle of your Brand X canoe.
21

Run the other end of the rope thru the Top Tie on the passenger side of the car as is clearly depicted here.  White rope, white car – what WERE we thinking?
22

Here’s where it gets trickier.  Make a simple loop in the rope as it comes down from the canoe.  This is like a magic trick so watch closely.
23

If your loop looks like this, please try again.
24

Take the underside portion of rope – the one that’s going to the Top Tie and pull it thru the loop that you are still holding with your right hand.  CLICK HERE for a diagram of what the heck is going on here.
25

Pull the top part of the rope up and the loop down. This will tighten the knot that holds the loop in place.  For giggles and practise, grasp rope on each side of loop and pull apart.  Loop should vanish like a magic trick.  If it does not pull out of the line, don’t quit your day job to follow the glamorous world of illusion.  Try it again.
26

This is how the Trucker’s knot is formed.  There’s one outfitter in Ely who claims he invented it, but I’m pretty sure that it’s been around for a lot longer than that particular outfitter.  To make this knot, you just need to make a loop (in blue) and pull yet another loop thru the loop you just made.  To complete the knot, pull up on the “From Canoe” side and down on the “Pull loop through” (red part) to complete the process.  To perfect this knot, tie a cord from the top of a lamp, down to your sofa.  While watching TV, tie it repeatedly until you can do it with your eyes shut.  When you can tie it with your eyes closed AND with one hand behind your back, you will become elevated to “Knot Master” worthy of accolades and applause from across the lands of northern Minnesota.
truckers knot

Pull on loop.
31

Presto!  A completed Trucker’s Knot that is completely removeable so you can continue sliding a rope through the grommets of your canoe.
32

You now take the end of the rope which has been patiently waiting in the loop of the  Top Tie on the passenger’s side of the car, lift it up and run it through the beautifully crafted removeable loop in the line (that you just made).

33

Pull down and notice the mechanical advantage you’ve just created.  Careful, no need to fold the canoe in half by pulling too tight.  This does not need to be super-tight because we’re not done just yet.

34

The key to effectively using this knot/loop thing lies in your ability to hold the line you just pulled on, right at the point where it passes through the loop with your thumb and index finger.  Once you grasp it right where the arrow is pointing, you can slack up the rest of the rope in preparation for the next move.

35

THE NEXT MOVE – keep holding with thumb and index finger on right hand and tie a simple half hitch with your left hand.  Can’t work with your left hand?  Tough, these are the only pictures I have.  Pull the half hitch tight and you now can let go with your right hand.  Use up the slack in the rope tying 65 decorative half hitches OR tie three more and whip out your knife.

36

See?  A pretty succession of half hitches!  You really only need about three.  I got a little carried away.

41

But whoa there, big fella, we’re not done quite yet.  You need to take a 14″ piece of rope and tie a loop in the end. Beautiful northwoods scenery in this shot.

42

In order to prevent the canoe from traveling from side to side in a crosswind, you need to wrap a loop of rope around the main rope going thru the grommets.
43

Not a lot of rocket science here. All we’re doing is binding the main rope to greatly inhibit the canoe from moving sideways.  I’m sure there are other ways to skin this cat, too.
44

Wrap the rope around a a couple of times.
46

Tie it off with more half hitches.
46

Viola! The finished product. If you do not have Canoe Carrier Blocks, or if your roof rack load bars are spaced less than 4 feet apart, I suggest that you tie down the back of the canoe to your trailer hitch or frame.  I didn’t do this on my van in the photos because I really wasn’t planning on driving anywhere. I just like to go out and tie one on for the fun of it.
Proper Canoe Tying

Here you see the finished tie down.  Two straps and the bow tied to the Top Ties on the front of the van. 

One final note:  I like to make all of my ties on the the passenger side of the vehicle.  If you have to stop on a road side to check or adjust the straps, you won’t have your butt sticking out in the traffic where a drunk, fool, or just plain bad driver can get you more easily.  Why ruin a good trip?

Who ever said mini-vans can’t look cool?
52

Order your canoe straps from us HERE. You will need two.

Order Your Top Ties Here
 (set of two)


How to Install Top Ties for Car-topping Your Canoe

Step 1:  Open hood of the vehicle – truck, car, mini-van, mini-van wannabe (SUV), it doesn’t matter.  The principal for installation is all the same.

Installing hood loops -top ties for hauling canoe

Step 2: Locate a fender bolt just back from the headlights.  This bolt should not be attached to any plastic parts such as brackets for the headlights, but instead only there for metal to metal securing purpose.  Every auto has them on both sides.  In most vehicles they will either be a 10 millimeter or 8 millimeter bolt.  In Chevy Yukons they are bigger like 5/8″ and in Porsches they use a #25 Torx bit.  I haven’t installed any in a Corvette yet so you Corvette owners are on your own.
12

Step 3: Pick a fender bolt and remove it. By “remove it”, I mean unscrew it.  Don’t chop it out with cold chisel or burn it with a torch.
Installing Top ties

Step 4:  Stick the bolt through the grommet of the Top Tie and re-install the bolt like you see above.
Install top ties for canoe hauling

Step 5: Do the same to the other side of the vehicle on the corresponding bolt. When not in use, the Top Tie gets folded over like you see above and then you shut the hood.  They just wait obediently for your next canoe hauling adventure.
15

Step 6:  To use them, simply open your hood, flip them out and shut your hood.  REALLY great idea!
Installing top ties for canoe hauling

NOTE:  Using only top ties (hood loops) with ropes on the front of your car for the bow of the canoe and with another tie on the back of your canoe to secure the stern to the trailer hitch – with no other proper straps over the top of the canoe securing it to the load bars – IS COMPLETE STUPIDITY.    Top ties (hood loops) are ONLY to keep the bow of the canoe from shifting when a semi passes you on the freeway.  Tying the bow and stern are secondary to the primary ties of TWO BONAFIDE CANOE STRAPS.   If you get this ass-backwards like about 40 % of the canoeing world, you are doing it wrong.   I can’t emphasize this more bluntly.  Doing it wrong puts other people’s lives at risk.   I don’t care how many years you’ve been tying canoes incorrectly without incident.   I say this because SO many  “experts” have argued with me here at the store.  “Well, I’ve been tying it like an idiot for 15 years now and never had a problem.”    Improperly tied canoes and the “experts” who do it  is one of my pet peeves, in case you haven’t noticed.


Buy a set of Top Ties (Hood Loops) Here


How to Paddle a Canoe – the Sweep Stroke

The Sweep Stroke 

by Red Rock Wilderness Store

This is the stroke I’m going to cal l# 2.5 with #1 being the J Stroke and #2 being the Draw Stroke. This stroke is more helpful to the stern paddler if the bow paddler actually knows how to sweep right or sweep left. Critical to this stroke is the hand placement, namely how far you slide the paddle out for leverage and the depth of the paddle blade. This stroke was impossible to photograph with my digital camera, but at least I can describe and show what it’s supposed to look like. The end result of a Sweep Stroke is to push the bow away from the paddle and pull the stern towards the paddle. As you’ll see in the pictures below, I would be causing the stern of the canoe to be dragged towards the paddle. As a stern paddler in a fierce wind, I would request a sweep left or sweep right from my bow paddler to force the bow the direction that I wanted to go. Also, in conjunction with my bow paddler who is sweeping on the the right, I would do a hard J Stroke on the left at the stern. This would cause the canoe to turn to the left quickly and with good power. Because the Sweep Stroke only dunks half the paddle blade at an angle in the water and more or less “sweeps” with a large arc (accompanied by splashing sounds of water getting shoved out of the way of the paddle as it skims on top), the bow paddler may need to perform several fast sweeps. This is possible to do because the paddle is not deep in the water like with a regular stroke.

————————————————————

1. For a stern Sweep, slide the paddle out in your hands and reach forward with the blade to putting it half way in the water. See that red and yellow arc? That’s where I would sweep. Note that my bottom hand now halfway up the shaft and much closer to my top hand. In order to produce an effective sweep, you need to get out there. Since leaning out there is ill-advised, you want to extend your paddle out instead. Notice that I crouch down a bit as I lean slightly forward and prepare to pull that canoe stern over. . (Incidentally, the canoe is not leaning as much as it appears – that’s camera lens distortion.
how to paddle a canoe - sweepstroke

2. With paddle half-way in the water, sweep across the water’s surface following the great big arc. Remember that the red arc won’t be there on most lakes so memorize this stroke.
how to paddle a canoe - sweepstroke
3. Continuing on the same sweep rotation. Note that in an action shot, you’d see a big splash arc much like you see on TV when a jetski is making a hard, banking turn at high speed. Who’d ever thought that I’d use reference to a jetski to illustrate a paddle technique?
how to paddle a canoe - sweepstroke

4. The final phase of the Sweep Stroke ends up way back at the stern of the canoe, thereby dragging the canoe to the same side as the paddle is located.
how to paddle a canoe - sweepstroke

From the Bow: Note that the bow paddler would execute the same maneuver from the front of the canoe by sliding the paddle forward as in Step 1, reaching out with a vertical blade right up next to the bow of the canoe, and sweeping in several big arcs. At the same time, the stern paddler applies a strong J Stroke with good forward power on the other side of the canoe and the canoe turns wherever it needs to go with relative ease unless it’s a Brand X kevlar canoe.  You can do backflips and somersaults in a Brand X canoe and it won’t turn in a wind.  But they sure do paddle straight and ride low in the water!  The lack of control combined with the non-existent freeboard in a huge wind is SO comforting!

How to paddle the Draw Stroke

How to paddle the J Stroke

How to Paddle a Canoe – the Draw Stroke

The Draw Stroke

by Red Rock Wilderness Store

Ok, this is the other main canoe stroke that you absolutely need to know. It is, for all intents and purposes, the exact opposite as the J Stroke. The J stroke pushes the back of the canoe away from the paddle and the Draw Stroke pulls the canoe to the paddle. Using the two strokes together allows you to stay on the same side of the canoe and change the canoe’s course of direction without switching sides on the canoe after every two strokes. We do this because switching all the time has “pilgrim” written all over it. Sure, everybody has to start somewhere, but, if after 25 years, you are still making the canoe go forward by paddling willy-nilly (see definition), I’m sorry but you STILL don’t know how to paddle. And, yelling at your poor wife in the bow about how “she isn’t a very good paddler” is just plain wrong. The guy/gal in the back of the canoe is the person entirely in charge of where the canoe is going, period. All responsibility for the direction of the canoe is with the person in the back.

“Paddling Willy-Nilly” is defined as paddling to make the canoe go forward via any means possible and most often using the twice-on-the-left-then-three-times-on-the-right-and-repeat-sloppily-while-waving-your-paddlestechnique. The bow paddler sits up front in a world of his/her own sometimes paddling on the same side of the canoe, sometimes not. Paddling Willy-Nilly results in far less control of the canoe and tends to generate many biting comments and insults usually hurled at the bow paddler for “not paddling right”. After 30 years of outfittng, if I had a dime for every time I’ve heard the belittling comments of a male with an inferiority complex bitching about his wife’s or girlfriend’s paddling inadequacies while up in the bow….it’s just not right!Paddlers of the Willy-Nilly technique tend to gravitate towards Brand X kevlar racing canoes with no rocker (and kayaks) because these inferior-for-anything-really-useful hulls require absolutely no skill to paddle in a straight line no matter what the paddling technique in employ. Unfortunately, these rockerless canoes require an inordinate level of paddling skill by both the bow and stern paddlers working as a team to actually turn them. And, that’s right about the time when all those insults directed at the bow paddler make a bold comeback…

Again, with the Draw Stroke (or any stroke for that matter) sit up straight and reach out to the side, draw the canoe to the paddle and then turn the paddle to push the canoe ahead in one smooth effort. Never just draw the canoe when lake paddling. Always draw to you first and then turn the paddle and apply power within the stroke. Opposite of the J Stroke, last part of the Draw Stroke is the power phase where you are pushing the canoe ahead. The canoe should not slow down appreciably during this stroke.

Bow Paddlers and the Draw Stroke – If you are going to teach your bow paddler anything show them this stroke. They would execute it exactly like I’m doing it in the pictures – it’s no different. It is up to the stern paddler to request a Draw Stroke on the right ot left of the canoe to pull it into the wind or help turn in a tight river. After a while, some paddlers can read each other’s minds and know what to do in a given situation like when a blast of wind hits the bow at an angle and threatens to take the canoe suddenly off course. Don’t assume that your paddling partner has mind-reading abilities just yet however. I’ve met several folks of both genders who have absolutely no sense of what to do when being blasted off course by a sudden gust of wind and you may not want everybody responding on impulse. Sometimes it may be better to maintain total navigational control from the stern and tell the bow hen to draw left or draw right. Practise and training makes the canoe travel quite well.

——————————————————————–

1. To execute a Draw Stroke while the canoe is gliding forward, you’ll turn your paddle blade to run parallel to canoe so it slices through the water with little resistance. The paddle slips freely in the water alongside as you can see above. Note that I’d been draw-stroking trying to catch the various phases of the stroke by the smooth water on the left side of the pic along with waves on the paddleside. I gotta get a better camera…
Paddling the Draw Stroke

2. In this pic, I’m in the process of using my lower arm to draw the paddle to me while holding/pushing outward with my high hand.   What is actually happening is the paddle ends up being planted in the water and I’m really dragging my butt and the canoe stern to the paddle.    Note that my upper body is not leaning but I’m relying on my arms to do the stroke while looking forward.  If you watch your stroke, you can’t tell what effect you are having on the canoe’s bow orientation.  A properly designed lake canoe will slide to the paddle with some resistance. A  more intensely rockered white water canoe like Souris River’s new Skeena would almost spin around in a circle using the draw stroke as hard as I am doing above.
How to paddle a draw stroke

3. Now this is the important part that I can easily never find it in all of the canoe books out there and it’s lack thereof is also evident because I meet so many folks who know the “draw” part but not the follow-through. The draw part alone is worthless for efficient lake paddling. To properly do this stroke, observe my top hand in picture 2 and above. Turn your hand so the paddle goes to “push” mode and end the Draw Stroke with a strong push back making the canoe go forward.
Draw Stroke in Canoe

Here is closer look of the Draw Stroke with its paddle-blade-path indicated. Reach out, stick the paddle in the water, pull to you and turn the paddle to push in one, smooth, strong maneuver. The back of the canoe will slide in the direction of the paddle and then slip forward as you turn the paddle to the power position and finish out the stroke.  It’s easy, very effective, and efficient but generally you won’t see the red arrow laying on the water setting up the stroke.   Sorry there is no template that you can bring along.   Just memorize the picture.
How a Draw Stroke works

 How to Paddle a Canoe – J Stroke

How to Paddle a Sweep Stroke

How to Paddle a Canoe – J Stroke

The J-Stroke

by Red Rock Wilderness Store

With all the “How to paddle a Canoe” books out there, I’ve decided that they really don’t hit the spot when it comes down to teaching somebody how to handle a canoe on flat water(AKA lake, pond, slow moving river). We don’t want to learn how to paddle in whitewater, not in screaming rivers or 5 foot waves, just on a lake – basic paddling techniques to allow one to go from point A to B in a straight line. You can’t find this easily in any books or at least I can’t. Most paddling books have so much extra info including advanced techniques (cross bow rudder, post and draw, blah, blah blah) that I think the gentle reader walks away from all that worthless learning a bit dazed and confused. So, this is my attempt to illustrate the TWO basic strokes that make a canoe go – a J Stroke and a Draw Stoke. There are lots of variations on these two strokes that tend to be explained ad nauseum in most canoe books, but I think everybody makes them a lot harder that they really are. Oh, and yes, I know there are several folks out there who have their own personal interpretation of the J-Stroke and they do all sorts of goofy things that ARE NOT the J-Stroke. For a proper, efficient and smooth J-Stroke, the top hand on the palm grip of the paddle ALWAYS ends in thumb-down position at end of the stroke – not thumb up, not thumb sideways, or any other derivation of the thumb. It’s thumb-down and push out with bottom arm, nothing else. Avoid the goofy variations your buddy developed in Nam, stick to the basics and remember this one simple fact: the canoe is steered from one side at a time by either pushing the stern to the right (J-Stroke) or pulling the stern to the left (Draw Stroke) and vice versa on the other side.

1. First part of the stroke. Observe my upper body. I’m sitting straight and once my paddle blade touches the water, the shaft is almost perpendicular to the water and NOT across my chest. Notice my upper arm and how far beyond my face my top hand is during the stroke. This is critical to good technique. If you are paddling with the top of the paddle in front of your chest or body, you are in a sloppy sweep stroke and you are now creating more problems for yourself and preparing to blame the canoe. Think I don’t know what I’m talking about? Guess again – you can’t believe how many times I’ve seen people flopping around with poorly executed sweep strokes and then blame the canoe or the bow paddler for navigational difficulties.

Paddling the J stroke

2. In this phase, the paddle is pulled through the water propelling the canoe forward. If you just pull the paddle straight back the canoe bow will automatically turn to the side opposite of the side the paddle is on. You need to implement a correcting phase at the end of your stroke and this is where we put the J in the stroke. Again, observe my top arm and the almost straight-up paddle shaft. Note that my hand and the palm grip of the paddle is well beyond my face NOT across my chest. If I were new to this, the outside muscle on my upper shoulder would start to burn after prolonged paddling. That’s normal. Paddle thru the burn and you’ll be less wimpy in the future.
How To Paddle a Canoe

3. Still in power phase of trhe stroke but watch my top hand as I move into picture #4. Upper body still straight and I’m looking straight ahead through the whole phase of each stroke. I’m actually lining up the head of my lovely wife Annette with a target on the horizon. This is how I determine how hard to push my bottom arm out for the “J” part of the stroke to correct for the canoe’s natural desire to turn to the right as I paddle on the left. If I were paddling on the right side straight ahead the canoe would turn to the left. To correct that anomaly and maintain a straight course I would need to push out a J Stroke with my lower arm on the right side.
How To Paddle the J Stroke

4. The final phase fo the J Stroke. Notice my top hand. From my perspective (as the stern paddler), my thumb is turned down and my bottom arm now pushes the paddle-now-turned-into- a- rudder outward. The paddle is now in the verticle postion and ends up at the back of the canoe as the stroke nears completion. Just like a rudder on the stern of a ship, the paddle exersizes leverage on the canoe pushing the stern in one direction and causing the canoe bow to move in the opposite direction. If you were observing me from a stepladder directly above, you would see my paddle stroke form a lazy letter J.

How to paddle a J Stroke

A “J Stroke” is a blend of two paddle maneuvers. The first half of a J Stroke is the power portion followed by the rudder portion which occurs in the last phase of the completed stroke. Sometimes you’ll just need a flick of the rudder part of the stroke and other times you’ll need to do a hard J. Watch your bow paddlers head as you look straight ahead to see what effect you are having on the canoe. If you watch your paddle, you’ll have no refined control over the canoe. Gotta sit up straight. look straight ahead and paddle like you mean it. If you’re a “paddle-dipper” you should maybe just get a room at the Holiday in and rent a movie. To paddle a J Stroke on the other side of the canoe, everything mirrors the picture about. Your hands switch but you still go thumb down and bottom arm out. It’s the same maneuver on the other side of the canoe.

Observe the background in the photos above. Notice the trees in the order of the photos. We travel from small hill to large rock as I push the back of the canoe over to my right. If I wanted to, I could push out really hard with my lower arm forming a more normal J and cause the canoe to turn very hard to my left which is the same side on which I’m paddling. I do not have to switch over to the other side of the canoe and paddle straight to make the canoe turn hard to the left. The key to efficient paddling is NOT switching sides every two strokes. As a general rule of paddling I recommend that you complete 15-30 strokes on the same side and both paddlers generally should always be on opposite sides. When either paddler gets tired of that particular side, they call out to switch and you both switch over to the other side at the same time in a nice smooth switch. Ideally, you should try to match your paddle cadence to your partner’s stroke up front to get a rhythm going. You’ll cover more ground with less effort as a result plus the canoe doesn’t wobble from side to side with all the activity. I find that it’s best for the stern paddler to match the bow paddler’s pace because it’s pretty hard for the bow paddler to match the stroke of the stern paddler unless they have their rearview mirrors in place.

When the wind grabs you or hits you at a 45 degree angle, the paddler in back (the person who’s totally in charge of the canoe’s steering control) may say to switch to maintain control over the canoe. For instance, if the wind is hitting the canoe on the right side, the stern paddler may find it advantageous to paddle on the left side and without a J-Stroke – just paddling straight ahead. The stern paddler calls a switch and paddles to match the strength of the wind to hold the canoe in position. If the wind is strong, the stern paddler might have to paddle really hard. You will always need to adapt to the elements and only a seasoned paddler will have the most control so practise without the panic. If the canoe is not going where you want, stop going forward, force the back to the direction it needs to go via Draw, Sweep, or J Stroke and then start again. Also, too, in all of these photos, I’m paddling an exceptionally well-designed canoe (Souris River Quetico 17) that provides the right amount of tracking and turning and actually is affected by a J-Stroke. A lot of Brand X kevlar canoes will not even budge for a properly executed J Stroke so you end up at the mercy of the wind and need to go around the whole friggin’ lake to turn around. Canoes that can’t be turned are a total waste of time and money unless you are a canoe racer.

——————————————–

Here’s another shot of me paddling a J Stroke on the other side of the canoe. You can see the smooth water that is the result of the canoe turning on the paddle side. Notice the undisturbed waves on the non-paddle side. The smooth side is akin to the contrail of a jetliner flying over. By observing the length and path of the smooth water you can get an idea for the speed that the canoe is traveling. We’re gliding right along and I’m actually holding the rudder portion of the J Stroke longer than usual for photo purposes. Dang digital camera is an older design and it’s really hard to paddle a complete stroke without making the canoe zip along at a rather fast clip. Camera takes forever to reset between shots.
How to paddle a J Stroke

How to Paddle a Draw Stroke

How to Paddle a Sweep Stroke

Packsack – This is what goes in a canoe

Framepacks are trails  –  Duluth-style Packs are Canoes

For Boundary Waters canoe trips, framepacks are kind of worthless, and here’s why. Framepacks are made to carry the bulk of the weight on your hips via a waist belt. The reason you want to carry the weight in this way is to reduce the fatigue one experiences when carrying one’s belongings entirely on the back, day in and day out. This is what you do when you go hiking. However this is not what is done when on a canoe trip. On a canoe trip, the canoe carries all of the weight for the vast majority of the distance traveled. And, the packs used are different accordingly.

Canoes were developed by the Indians in this area to haul a load efficiently over water and allow for easy transporting over portages. A lot of the portages are shorter, some are really long. But canoes were developed in this region because they fit. Kayaks on the other hand where built by coastal peoples, the Eskimos, out of whale bones and seal skins to sit on the beach, be dragged to the water where the enclosed deck kept the raging seas out of the craft while they paddled out to shoot a walrus and drag it home behind the kayak. That’s why kayaks tend to excel in coastal (no portages) waters and canoes excel in wilderness waters like the BWCA and other areas where the lakes are connected by portages. Portaging kayaks is an exercise in grunting inefficiency and paddling canoes in raging seas where you could be turn over easily is not really all that it’s cracked up to be. Oh sure, you can portage a kayak and with the proper flotation bags and handling skills, you can eskimo roll a canoe. But neither watercraft is practical when it’s out of it’s element. And in the BWCA, framepacks are out of place and not practical either.

Frame packs stick out of the canoe. They NEVER lay down quite right without a lot of dinking around and they catch brush in brushy situations which would describe the entire BWCA wilderness on portages. Plus, with a frame pack you never will be able to carry a canoe, unless it’s one of those rare framepacks which is designed to carry a canoe. That particular pack STILL resists fitting in 99% of all canoes without a lot of manipulation, planning and cussing.

This brings us to the “blank”- style packsack. (You’ll need to fill in a proper town name for the word “blank”.) This pack was designed by real experts at the time (with a lot of trial and error – I assume) over 200 years ago to load quickly and then mush down inside the canoe. It basically has remained the same design concept for this whole time and has been around since way before all the legal stuff started back in the 1800’s. The packs were and are still simple and named after the famous guy who explored in this area for which a city was also named kind of in this area. I think they should rename that city “Kondos”. They make excellent packs and then I wouldn’t have to be so friggin’ cryptic.

Consider the way a “blank”-style packsack is used in wilderness situations. It is not at all unusual for you to paddle across a lake, hit the portage, throw on the pack, walk about 100 feet over the portage and be on water on the other side. Not all portages are ten miles long and many are quite short. By the time the guy in the other canoe with his frame pack remembers exactly how he fished that framepack (AKA Rubick’s Cube) in and out of his canoe, you will be leaning into your shoulder straps of your “blank”-style pack and then on the other side of the portage. THEN, top it all off with the unique ability that you have to carry your lightweight Souris River Canoe Quetico 17 on your shoulders while carrying your “blank”-style pack (because that’s what they were designed to do – carry a load AND the canoe). Meanwhile, the guy with the frampack has his last nylon buckle kachinked in place and now he’s finally ready to go with that frame pack – for 100 feet. Your canoe is loaded and you are already on the water, paddling 300 feet across the pond and hitting the next portage, and doing the same thing with your canoe and “blank”-style pack. The other guy is still standing on shore messing around while unclipping with his framepack so he can go back for his canoe because he couldn’t carry them both. Framepacks interfere with the carrying yoke on a canoe and “blank”-style packs do not. There’s a LOT to be said about efficiency when keeping the pack simple. The voyageurs knew this and they carried a lot heavier loads than we do today with all of our modern, lightweight toys. Those guys were carrying wet (non-dried) beaver hides. Let me tell you that I have carried wet beaver hides as well. That’s not a light load by a long shot.

Over time, pack makers, and there are many, have developed niceties and improvements such as 1000 denier cordura nylon, nylon straps, padded contoured shoulder straps and the handy-dandy map case. Our Kondos brand #3.5’s and #4 packs are all custom built with a waterproof bottom so when your pack is on the floor of the canoe in the rain, your gear is not sitting in the water. Incidentally, Kondos Outdoors also makes beautiful, nostalgic packs of leather and canvas but I don’t care for canvas as compared to cordura nylon. Cordura nylon, in my extensive observations as an outfitter, repells water well, doesn’t really require any maintenance, resists rotting, and dries really quickly.

For those of you wanting to keep your gear drier, there are plastic pack liners as well. Cordura is very water repellant (or at least our’s is) but sometimes it’s nice to have some extra protection, especially if you are using a fairly worn-out pack you bought used from an outfitter. You can order packliners for your packs here:pack liners

1. This is our most popular-sized pack. It’s a 3.5 Kondos pack and also known as the famous “blank”-style pack. I don’t know the cubic inches and I also don’t care. This pack is a smaller but still a very useful equipment pack or makes a great combination personal gear & some equipment pack. All of our Kondos packs have an inside pocket which is very useful to access stuff you want to get at quickly. The #3.5 is our best selling pack bay far and that should tell you something. Not too big and not too small. Goldilocks would have been a fan of this size packsack. It hauls the perfect load of porridge.
1

2. This is a side view of the 3.5 Kondos Pack. There is no gusset in the side wall. Note the black grab handle. When I was growing up, I was taught that one always grabs the pack by the ears (sides of the buckled down cover flap) in handling and not the shoulder straps except for when putting the pack on my back. Now, our Kondos packs come equipped with lowered grab handles on each side (lower to allow you to more easily clear the gunwales while loading into the canoe) so you can’t screw up and dump all your gear all over the canoe landing by grabbing it by the shoulder straps. Now, the cynical side of me says that that doesn’t mean you won’t dump your gear out on the ground, however. After demonstrating how to properly pick up a pack to our outfitting customers for the past 30 years, 70% of them pick it up incorrectly a mere 30 seconds after I’ve shown them how to do it right. Focus? What’s focus?
2

3. This pile of gear I grabbed from shelves in Red Rock just to demonstrate what will go into #3.5 Kondos Pack. There were five Lafuma Sleeping bags, three 72″ Thermarests, six canoe seat pads. My cap is there for scale.

3

4. This is what the Kondos 3.5 looks like with gear just tossed inside. Normally, one would plan a bit more when packing, making sure that the sleeping backs or clothing is against one’s back and other hard stuff is not there. Notice that there is still room for a bunch of gear. You can also put your gear in a plasic liner bag that we sell to keep the weather from above out. Now, if your pack is fairly new and not one that was beaten to death by an outfitter, it will easily keep your gear dry for a long time. The liner bag is an extra precaution.
4

5.This is the waterproof bottom. It happens to be a camoflage colored piece of cord-reinforced vinyl. This does a good job in keeping out water, but you may want to seam seal the stitching at the bottom of the pack.

5

6. Our next most popular pack is the Kondos #4. Sometimes you see this pack overstuffed but it is not so in this picture. To know how much it holds, I took all of the gear from the #3.5 and placed it inside inititally.
6

7. Here it’s pictured with the gear from the #3.5 Notice all the extra room inside. You could almost put another 3.5’s gear inside. This is a big, roomy gusseted pack which is mainly used for hauling bulky, lighter gear like sleeping bags, pads, cook-kits, campstoves, fuel, tarp, saw, and tents.
7

8. This pack is different from the #3.5 because it has a gusseted sidewall indicated by the yellow, double-ended arrow below. Notice the usual lowered grab handles for easier lifting over the gunwales of the canoe. This pack comes with the same camo, waterproof bottom and inside pockets for things like your matches, compass, camera, small tackle box, etc.8

9. Here the same #4 Kondos with the same gear as above but with the addition of TWO, 3-man Alps Outfitter tents. I still had room for more stuff but since I was burning daylight, decided that I should just go with this load. Notice the gusset flaps with the fastex buckle and adjustable strap. When you have someone who can’t tie their shoelaces let alone a knot, this a really handy, quick feature for securing your gear. A Souris River Quetico 17 will easily take four #4 packs with room to spare. A Souris River Quetico 18.5 can haul six # 4 packs with room to spare.
9

10. These are the contoured, padded shoulder straps. They adjust much faster than the old leather-with-buckle traditional design. To snug this pack up to your body size, simply put it on your shoulders and pull down on the bottom straps below the silver buckles

.10


Red Rock’s Excellence in Paddling

7degreevert

Red Rock’s Excellence in Paddling
You may have noticed that on this sight, I have a tendency to “toot my own horn” a little here and there about Red Rock’s Excellence in Paddling-related Subjects.   It’s either with our superior quality Souris River Canoes, or our common sense approach to canoe handling, tie-downs, eating northern pike, crating canoes for shipment, etc.    Well the bravado never ends and I’m now going to show you the absolute BEST bent shaft paddle combination for moving any canoe.    As of April 14, 2005, there is absolutely no other canoe shop on the planet who recommends this paddle combination and I’m pretty sure they’ve never even considered this before, ever. So, here goes – this is the very best you can get to move your canoe faster if you are a recreational paddler.

If you’ve ever used a bentshaft paddle, (and you held it properly) you undoubtedly noticed that the canoe moves faster forward than with the use of straight shaft paddles. That’s because a 14 degree (most common bend) paddle is all about “push” in the water.

How a bentshaft paddle works

In a bent shaft paddle, because the handle is bent forward, it clears the paddler’s upper torso as it’s drawn through the water. The bend allows this paddle to be pulled through the water with BOTH arms for a shorter, but powerful stroke. (“A” represents the water being pushed (or “pulled through” resulting in push “C” to the canoe) That’s all a bent shaft it really does well. Because of the bend, more blade pushes water more effectively without lifting water as you’ll see on the next page. Doing a J-stroke with a 14 deg. paddle requires that you really do a swing-over-with-the-top-of-the-paddle-handle-maneuver to make a J in the water with the paddle on it’s side in rudder position. It’s clumsy and inefficient so a lot of what you gained in a powerful stroke, you give up while paddle wrestling.

Bent shaft paddles are really made to paddle using the sit-and-switch racing technique which means that two paddlers are located on opposite sides of the canoe. They paddle with short, fast, synchronized strokes, usually three each, and then one paddler says HUT and they switch simultaneously to the other side without breaking stride. I can paddle like this for about a mile and then my shoulders start to ask what the heck I’m doing that for, anyway? If you like marathon paddling, that’s one thing. Otherwise, marathon stroking is kinda dumb for BWCA travel for regular folks. Instead of blowing out all of your ooompf on a race down the lake, my paddle combination will help you improve your present paddling power so you may not be as tired when you finally get there.

The Straight-shaft Paddle
It’s been around since the dawn of canoe time and the straight shaft canoe paddle isn’t ever going to leave. There’s nothing wrong with straight shaft paddles but there’s nothing wrong with improving either.

Straight shaft paddle stroke

Because the straight shaft paddle does not clear the body of a paddler like a bent shaft paddle does, the paddle-swinging dynamics change. The paddle gets lifted higher into the air before it’s dunked in the water. Then, as it is pulled through the water by the blue arm, the green arm ends up actually pushing forward. This makes the blue arm point of contact act like a fulcrum or the “pivot point on a see-saw”. As the paddle is being pulled through the water, the shoulders of the paddler drop with is and pull it through the water. The result in this stroke is that in the Total Stroke length, only about 1/3 or 33% of the entire stroke is “push”. Starting at stroke-point “E” above, the paddle is not pushing water back but instead lifting water. Instead of effectively pushing the canoe forward, the lifting force of the paddle is actually pushing the paddler’s butt (and the canoe) down into the water.

But, this paddle does a J-stroke beautifully. Just by dropping the shoulders at the end of the stroke and rotating the shaft downward by the top of the paddle (thumb on the hand of the green arm turns down thereby standing the following-through paddle blade into a rudder at the back of the canoe). The end result is that a straight-shaft paddle is more about steering than about push.

14 degree bendtshaft paddle

The 7 Degree Bent shaft Paddle
This is the compromise paddle. As I type, I hear the drums beating in the distance by the “experts” on both sides as they eschew the sins of compromise, but to them I say “beat it”. Yes, a combination paddle (called a combi paddle) doesn’t do it’s best in either world.   It doesn’t give maximum push and it doesn’t give maximum steering.   But, just like combi skis for cross country skiing which do a pretty good job of skating AND classical skiing, the 7 degree bent shaft offers two great improvements in power and steering over both of it’s brethren paddles.  If you’re not a racer and not a slacker, you’ll probably really love this combi paddle!  We have many, many, many paddlers who would agree.

7 degree bentshaft paddle

The 7 degree paddle does a great job because it gives more push from it’s total stroke than the straight shaft paddle. Yet, because it’s flatter (in the amount of bend) than the 14 degree, you can effectively make a good J Stroke with it. The result is about 1/3 more power per stroke over a straight shaft paddle. This allows the guy in the back to really kick it down if he needs to do so when maneuvering the canoe especially in the wind. And, if he needs to do a draw stroke, there’s less accommodation of the larger bend of the 14 deg. paddle.

I feel that this is by far the best combination of paddles for any “not-being-raced” canoe. Put a 14 deg. bent shaft in the bow and a 7 degree bent shaft in the stern. You’ll notice that your canoe’s speed will increase yet your effort will remain the same. Short of attaching a rocket engine to the stern, there’s not much more you can do to kick up your speed for a small investment. It works very well. Note: If you are paddling a heavy, floppy, plastic canoe made by a company that makes camp stoves and coolers, use of this paddle combo will elicit stares. You really need to upgrade your canoe before the paddles.

We have our 7 degree bent shafts custom built for us by Mitchell See them Here

How to size a 7 Degree Bent shaft Paddle: Over 6′ Tall = 56″ Under 6′ tall = 54″  More refined: Long torso shorter legs, use the 56″.  Shorter torso, longer legs, use the 54″.  Torso height is what determines paddle length. All that crap about putting the paddle on you toe and sticking the end under your armpit, or up to your nose, or up to your eyebrow – that’s all BS.  From the bottom of your butt, how high the seat is in the canoe, how low the canoe sinks into the water, and your shoulder height, and whether or not you are seated in the bow or stern,  pretty much determines the paddle length.  I’ve seen so many wives tale, made-up, ridiculous ways to measure a paddle, and then they want to argue with me after asking “What size?”.    If you know the answer, why bother to ask?

Canoe Definitions

tumble home on a a canoe
Tumble Home on a canoe looks like this

Definitions of Canoe Terms

Gel coat – silica sand in a vinylester or polyester resin base which is applied to the canoe to reduce abrasion in kevlar or fiberglass canoes.  Adds weight and sometimes cracks up on impacts.  Gel coat is on everything from canoes, to speed boats, to shower stalls.  Makes a nice clean, smooth finish but also hides serious flaws and sloppy workmanship.  Avoid canoes which have gel coat on the inside – too heavy and who knows what your getting?

Royalex –  (extinct)  Trade name for an ABS plastic foam sandwich material which in the canoe world, has a vinyl color on the outside, a thin layer of harder ABS plastic next ( whitish-green color), ABS closed-cell foam next (grey, foamy looking) ABS plastic layer (whitish-green again) and the inside layer of vynil color.  It comes in big sheets, is heated in a oven and then sucked into a vacuum mold the shape of a canoe that comes down from the ceiling to pick it up.  It cools rapidly in the mold which splits open and drops the newly formed canoe to the floor where it is trimmed and gunwales and seats installed.

Polyethylene (P-tex) – available in linear or crosslinked design.  Linear is just one sheet of tough polyethylene which has been formed to make a canoe using heat.  Incredibly tough, but makes a cheap, bathtub-like canoe which usually needs the support of a keelson (long pipe or tube that lays in the keel in the bottom of a cheap canoe) and other aluminum tubing to keep its bottom from flopping up and down in the water.  Cross linked polyethylene canoes are usually formed from poly pellets in a heated, rotary mold which spins and rocks as the first layer (outside layer) is dumped into the mold and melted into a canoe.  Then the middle foam layer is added and finally the inside layer of pellets is added. Whole thing then cools and out pops the craft.  These are heavy and indestructible canoes and about the same price as lighter weight aluminum canoes.

Cloth Layup Canoes – canoes which are made from essentially some sort of cloth that comes off of a big roll.  Layers of cloth is cut into a rough shape, laid into a female mold and resin is pour in on top of the cloth and then squeegeed  thru the layers using paint rollers and rubber squeegees. These canoes are made out of various blends of cloth including but not limited to kevlar, carbon fiber, fiberglass, duralite and tuffweave  (both proprietary cloths made by different companies as a less expensive alternative to more expensive exotic cloths like kevlar, et al.)

four sheet construction
This is what four sheets of cloth would look like. They are laid into a female mold and wetted through with resin. The resin hardens, the mold comes off, and the result is a cloth-layup canoe. Could be kevlar, fiberglass, polyester, or old T-shirts. The cloth gives the shape and reinforcement, the resin seals out the water.


Vinylester resin – a two-part resin used to hold cloth layup canoes together in the shape of a canoe.  Generally thinned out with liquid styrene to make if flow more easily at room temperature.  Cures at room temp.  Bonds to fibers at about 500 PSI .

Epoxy Resin – a two part resin that holds cloth into shape of canoe.  Applied under heated conditions and requires heat to cure it in its purest form.  Bonds to fibers at 2000+ PSI

Skid plates – A “shoe” or covering made from kevlar felt material.   It’s a thicker cloth that acts more or less as a sponge to hold a larger quantity of resin in one place for the canoe to use as guard in the bow and stern areas which take the greatest abuse on any canoe.  Skid Plates or Bang Plates save the bow and stern from abrasions received while landing the canoe or pushing off from shore.  The bow and stern take the most abuse since the entire weight of the canoe ends up on a little strip about 1/2″ wide by 4″ long if you slam into shore.  The bows of  kevlar and plastic canoes without a good skid plate don’t last long in these situations so you see a lot of “wet foot” canoeing where paddlers jump in up to their knees to save that delicate bow or they install the skid plate themselves.  A few companies build them right into their canoes.  On other canoes, it’s up to the canoe owner to install or have them installed if needed.

Skin-Coat hulls – are made of,  in most cases, just the resin that’s been squeegeed thru the cloth layup of the canoe when it was built. The shine you see on a skin coat is resin which cured making a duplicate of the female canoe mold.  Many major companies make skin coat canoes because they are the lightest in weight.  Unfortunately, the resin doesn’t provide a lot of abrasion resistance and rocks literally can tear into the bulky/coarse weave of kevlar cloth as the canoe passes over them.  When you flip over most used,  skin coat kevlar canoes and examine them closely, you’ll see that there are fibers about 1 mm long sticking out along the scratch.  To prevent fiber tear-out in kevlar canoes, some builders apply a thin layer of fiberglass over the kevlar.  Fiberglass is easier to repair, holds up to abrasion much better and ultimately protects the main cloth (kevlar, carbon, etc.) from excessive damage.

Flat Canoe Bottom
Flat Canoe Bottom – Feels secure, but can tip suddenly when canoe is leaned to far.


Shallow-arched bottom of canoe

Shallow-arched bottom of canoe- feels tippy and jittery but can lean over much farther than flat-bottom without rolling over completely.


cantilevered canoe bottom
Cantilevered canoe bottom – unsettling feeling when canoe is not fully loaded.  It feels tippy with a light load and will either “dump” to the right or left and then stabilize.  More suited to white water for leaning the canoe over to maneuver quickly.

The best canoe bottom is a combination of flat and shallow-arched shapes.  Then it has good initial stability and the ability to lean over without rolling (secondary stability).

rocker
Canoes with “rocker” can turn and maneuver. Non-rockered canoes don’t turn easily and travel faster through the water because they are not pushing that upside-down “hump” you see in the exaggerated diagram.


tumble home on a a canoe
Tumble Home on a canoe looks like this – the top sides of the canoe hull in to allow for more comfortable passing by of your hand on the lower part of the paddle.

I don’t care what anybody says.  Tumblehome does absolutely nothing for the canoe’s stability.  It exists to allow your bottom hand clearance when holding the paddle.   Also, tumblehome promotes sloppy paddling technique as you are able to keep the paddle in a “sweep” stroke position as opposed to as perpendicular to the water as possible.

So there you have it.   More information than you probably need, but it’s free.